| After Incidents
|
|
| Suggested Level
|
80
|
| Requirements
|
|
| Start Location
|
Elzion Cargo Station
|
| Reward
|
|
| Release Date
|
Sept 13, 2019
|
Summary[edit]
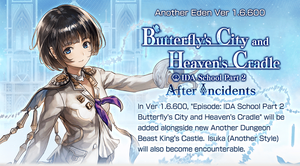
 This content unlocks Saki Another Style. After completing IDA School Part 2: Butterfly's City and Heaven's Cradle, return to the Cargo Station to commence a series of Awaken Series fights. On release, there was a requirement to wait 6 hours before you can take on the next fight however this has been removed.
Procedure
| Destination
|
Notes
|
| Elzion Cargo Station |
Fight Cradle Alpha, Cradle Beta, & Cradle Gamma |
| IDA School - H Block Sky Terrace |
Fight Cradle Alpha, Cradle Beta, & Cradle Gamma |
| Airtube Station |
Fight Cradle Alpha, Cradle Beta, & Cradle Gamma |
| IDA City Entrance |
Fight Cradle Omega, Cradle Delta, & Cradle Epsilon |
| IDA Medical Realm |
Fight Cradle Omega, Cradle Delta, & Cradle Epsilon |
Elzion Cargo Station
 to image to stats
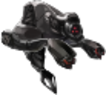
Skills: Cradle Alpha (Quest Mob)
| Turn | Name | Effect |
|---|
| Cradle Alpha |
| - |
Wonder Killer Shot | Piercing attack x3 on one enemy |
| - |
Auto Charge | Self PWR Up |
| - |
Mind Shot | Piercing attack x3 on one enemy + INT Down |
Elzion Cargo Station
to image to stats
Skills: Cradle Beta (Quest Mob)
| Turn | Name | Effect |
|---|
| Cradle Beta |
| - |
Focus Signal | Inflict Rage on all enemies |
| - |
Physical Protector | Self physical RES Up |
| - |
Overshock | Blunt attack on all enemies |
Elzion Cargo Station
to image to stats
Skills: Cradle Gamma (Quest Mob)
| Turn | Name | Effect |
|---|
| - |
Shock Charge | Prepares for Shock Flash |
| - |
Shock Flash | Blunt attack on one enemy + stun |
| - |
Blunt Flash | Blunt attack on all enemies + SPD Down |
| - |
Overshock | Blunt attack on all enemies |
| - |
Auto Maintenance | Heal all allies |
This fight consists of combat with Elzion Alpha, Beta, and Gamma. Gamma is weak to all forms of magic, while the other two units have no weaknesses or resistances.
| Turn
|
Cradle Alpha
|
Cradle Beta
|
Cradle Gamma
|
| 1 |
Wonder Killer Shot | Focus Signal | Shock Charge |
| 2 |
Auto Charge | Physical Protector | Shock Flash |
| 3 |
Normal attack | Overshock | Blunt Flash |
| 4 |
Mind Shot | Return to step 1 | Return to step 1 |
| 5 |
Return to step 1 | - | - |
| At 60% HP or lower |
| 1 |
Mind Shot | Focus Signal | (nothing) |
| 2 |
Wonder Killer Shot | Physical Protector | Auto Maintenance |
| 3 |
Auto Charge | Overshock | Shock Flash |
| 4 |
Normal attack | Return to step 1 | Overshock |
| 5 |
Return to step 1 | - | Return to step 2 |
Sky Terrace
to image to stats
Skills: Cradle Alpha (Quest Mob)
| Turn | Name | Effect |
|---|
| Cradle Alpha |
| - |
Wonder Killer Shot | Piercing attack x3 on one enemy |
| - |
Auto Charge | Self PWR Up |
| - |
Mind Shot | Piercing attack on one enemy x3 + INT Down |
Sky Terrace
to image to stats
Skills: Cradle Beta (Quest Mob)
| Turn | Name | Effect |
|---|
| Cradle Beta |
| - |
Focus Signal | Inflict Rage on all enemies |
| - |
Physical Protector | Self physical RES Up |
| - |
Overshock | Blunt attack on all enemies |
Sky Terrace
to image to stats
Skills: Cradle Gamma (Quest Mob)
| Turn | Name | Effect |
|---|
| Cradle Gamma |
| - |
Blast Charge | ? |
| - |
Blow Away | Force 1 enemy into reserve |
| - |
Blunt Flash | Blunt attack on all enemies + SPD Down |
| - |
Overshock | Blunt attack on all enemies |
| - |
Auto Maintenance | Heal all allies |
This fight consists of combat with Elzion Alpha, Beta, and Gamma. Like before, Gamma is weak to all forms of magic, while the other two units have no weaknesses or resistances. Gamma now has the ability to knockback frontline party members into reserve.
| Turn
|
Cradle Alpha
|
Cradle Beta
|
Cradle Gamma
|
| 1 |
Wonder Killer Shot | Focus Signal | Blast Charge |
| 2 |
Auto Charge | Physical Protector | Blow Away |
| 3 |
Normal attack | Overshock | Blunt Flash |
| 4 |
Mind Shot | Return to step 1 | Return to step 1 |
| 5 |
Return to step 1 | - | - |
| At 60% HP or lower |
| 1 |
Mind Shot | Focus Signal | (nothing) |
| 2 |
Wonder Killer Shot | Focus Signal | Auto Maintenance |
| 3 |
Auto Charge | Physical Protector | Blow Away |
| 4 |
Normal attack | Overshock | Overshock |
| 5 |
Return to step 1 | Return to step 2 | Return to step 2 |
Airtube Station
to image to stats
Skills: Cradle Alpha (Quest Mob)
| Turn | Name | Effect |
|---|
| Cradle Alpha |
| - |
Wonder Killer Shot | Piercing attack x3 on one enemy |
| - |
Auto Charge | Self PWR Up |
| - |
Mind Shot | Piercing attack on one enemy x3 + INT Down |
Airtube Station
to image to stats
Skills: Cradle Beta (Quest Mob)
| Turn | Name | Effect |
|---|
| Cradle Beta |
| - |
Focus Signal | Inflict Rage on all enemies |
| - |
Physical Protector | Self physical RES Up |
| - |
Overshock | Blunt attack on all enemies |
Airtube Station
to image to stats
Skills: Cradle Gamma (Quest Mob)
| Turn | Name | Effect |
|---|
| Cradle Gamma |
| - |
Blast Charge | ? |
| - |
Blow Away | Force 1 enemy into reserve |
| - |
Blunt Flash | Blunt attack on all enemies + SPD Down |
| - |
Overshock | Blunt attack on all enemies |
| - |
Auto Maintenance | Heal all allies + Regen |
This fight consists of combat with Elzion Alpha, Beta, and Gamma. Gamma is weak to all forms of magic, while the other two units have no weaknesses or resistances. This time, the drones will not waste any time before commencing healing.
| Turn
|
Cradle Alpha
|
Cradle Beta
|
Cradle Gamma
|
| 1 |
Wonder Killer Shot | Focus Signal | Blast Charge |
| 2 |
Auto Charge | Physical Protector | Blow Away |
| 3 |
Normal attack | Overshock | Blunt Flash |
| 4 |
Mind Shot | Return to step 1 | Return to step 1 |
| 5 |
Return to step 1 | - | - |
| At 60% HP or lower |
| 1 |
Mind Shot | Focus Signal | Auto Maintenance |
| 2 |
Wonder Killer Shot | Physical Protector | Blow Away |
| 3 |
Auto Charge | Overshock | Overshock |
| 4 |
Normal attack | Return to step 1 | Return to step 1 |
| 5 |
Return to step 1 | - | - |
IDA City Entrance
to image to stats
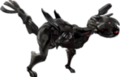
Skills: Cradle Omega (Quest Mob)
| Turn | Name | Effect |
|---|
| 1 |
Tail Vulcan | Piercing attack x3 on one enemy |
| 2 |
Spray Shot | Piercing attack on all enemies and inflict pain |
| 3 |
Piercing Laser | Non-type magic attack on all enemies |
| 75% HP and below |
| 1 |
Tail Vulcan | Piercing attack x3 on one enemy |
| 2 |
Spray Shot | Piercing attack on all enemies and inflict pain |
| 3 |
Heavy Gear | Non-type magic attack on all enemies |
| 4 |
Full Charge | Self PWR Up (2 turns) |
| 5 |
Piercing Storm | Wind-type piercing attack on all enemies |
IDA City Entrance
to image to stats
IDA City Entrance
to image to stats
The main threat of this fight is Cradle Omega, but it also summons Cradle Delta and Cradle Epsilon to assist it. Cradle Delta is weak to Slash and resists all other damage types; Cradle Epsilon is weak to Fire and resists all other damage types.
| Turn
|
Cradle Delta
|
Cradle Epsilon
|
| 1 |
Focus Signal | Mind Pulse |
| 2 |
Snap Shot | Blunt Flash |
| 3 |
Physical Protector | Mind Shot |
| 4 |
Return to step 1 | Stun Flash |
| 5 |
- | Heavy Gear |
Cradle Omega starts off weak to all magic and immune to all other damage types. Once it reaches 75% HP, it changes its immunities, becoming weak to Slash and immune to everything else. Once it reaches 50% HP, it changes its immunities, becoming weak to Pierce and immune to everything else. Finally once it reaches 25% HP, it changes its immunities, becoming weak to blunt and immune to everything else. You can speed through the phases with Another Force, but you cannot skip over phases this way as its HP will refuse to drop at each threshold.
At the 12th turn, Cradle Omega declares the charging of its Omega Decomposer. At the 15th turn and every 5 turns afterwards, it will also declare its charging progress. At the end of the 32nd turn, Cradle Omega will fire the Omega Decomposer, dealing an unstoppable 9999 damage to the party.
IDA Medical Realm
to image to stats
Skills: Cradle Omega (Quest Mob)
| Turn | Name | Effect |
|---|
| 1 |
Tail Vulcan | Piercing attack x3 on one enemy |
| 2 |
Spray Shot | Piercing attack on all enemies and inflict pain |
| 3 |
Piercing Laser | Non-type magic attack on all enemies |
| 75% HP and below |
| 1 |
Tail Vulcan | Piercing attack x3 on one enemy |
| 2 |
Spray Shot | Piercing attack on all enemies and inflict pain |
| 3 |
Heavy Gear | Non-type magic attack on all enemies |
| 4 |
Full Charge | Self PWR Up (2 turns) |
| 5 |
Piercing Storm | Wind-type piercing attack on all enemies |
IDA Medical Realm
to image to stats
IDA Medical Realm
to image to stats
| Turn
|
Cradle Delta
|
Cradle Epsilon
|
| 1 |
Focus Signal | Mind Pulse |
| 2 |
Snap Shot | Blunt Flash |
| 3 |
Physical Protector | Mind Shot |
| 4 |
Return to step 1 | Stun Flash |
| 5 |
- | Heavy Gear |
The final fight with Cradle Omega and its support is no different from its previous version, just with more stats and health. Saki will then gain her Another Style form after the battle, at no cost.
- Units who have multiple modes of attack are great for the fight. Cerrine, Joker and Morgana can strike its different weaknesses as the fight progresses.
- While Cradle Delta and Epsilon are active, minimal damage can be inflicted to Cradle Omega even if it is hit with an attack that is a weakness. As such, your starting frontline is preferably units with Fire and/or Slash skills to destroy the Delta and Epsilon. A fire mage like Gariyu can also help progress Cradle Omega's first phase.
- Since the AF stoppers are spaced close together, it's best to unleash a half-bar Another Force to advance to the next phase.
- As such, characters who can recharge AF quickly will significantly help.
- You may want to avoid using Zones - e.g. hitting its weaknesses with multi-hitting attacks that strike three or more times per turn charges the AF gauge more than using an attack that matches a normal Zone.
- Any units who cannot damage Cradle Omega can still switch back and forth to support with their Valor Chants.
- The Pseudo Spell skill added from the Wisdom Weapons Set can provide characters with a magic attack they normally would not have available. Certain Grastas also provide access to additional skills that could increase a character's flexibility in this battle.
- The mixture of both physical and non-Type magical attacks may require both PWR and/or INT debuffing to survive.
- Note that while the game provides no warning of this fact, this is actually one of the earlier Superboss fights in the game: it is not meant to be trivial, but rather an optional challenge for those who enjoy such things. Come prepared - e.g. your characters should be at high level, with all their skills unlocked, an appropriate weapon equipped (e.g. Tocachev), etc. It is very do-able, entirely without any later-game gear including grastas or gacha characters, but it will take more noticeably greater effort on your part than a mere story boss.
| Rank |
Name |
Requirement |
Reward
|
 | Enigmatic Machine | Beat ??? once |  x10 x10 |
| Reveal the Repeated Incidents | Beat ??? twice | x10 |
 | The Suspicious Boy | Suppress the out of control Cradle System three times | x20 |
| The Sorrow of AI | Suppress the out of control Cradle System four times | x20 |
 | The Two Defenders | See the Two Defenders for yourself. | x50 |