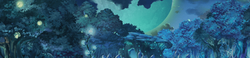
Rare Areas[edit]
It is possible for the 2nd and 3rd maps of a dungeon to turn into a Rare area. These maps have the same map layout, and the only difference is the name of the map being a different name as their normal counterparts. The following is a list of the rare map names:
| Dungeon | Map 2 Rare Name | Map 3 Rare Name |
|---|---|---|
| Antiquity Zerberiya Continent: Shade | Uncharted Region Verdot - Hill Spring Path | Spirit Sanctuary - Floor of Darkness |
| Antiquity Zerberiya Continent: Thunder | Barbera Untrodden Region - Unexplored Area | Davola Underground Caverns - Sanctuary |
| Sea of Ice | Sea of Sear | Sea of Splendor |
| Sapient Complex: Midnight | Sapient Complex: Midnight - Physical Sciences | Sapient Complex: Midnight - AS Sector |
| City of Lost Paradise | Schnaud Castle - Twin Wing Floor | Schnaud Castle - Tower of Gifted Sword |
| Mysterious Vortex - Warped Cochlea | Warped Cochlea - Magic Control | Warped Cochlea - Magic Research |
| Antiquity Zerberiya Continent: Crystal | Crystalline Tower - Azure Floor | Crystalline Tower - Sky Floor |
| Iscariot | Iscariot - Blazing | Iscariot - Gloaming |
| Forest of Forgetfulness | Forest of Forgetfulness - Secret Path | Forest of Forgetfulness - Guiding Woodlands |
| Hanging Garden | Hanging Garden - Music Plaza | Hanging Garden - Dense Mountain Garden |
| Moonlight Forest | Moonlight Forest Thorn Road | Moonlight Forest Mysterious Path |
| Industrial Ruins | Industrial Ruins Furnace Hazard Area | Industrial Ruins Area R |
| Nadara Volcano | Nadara Volcano Rare Species' Nest | Nadara Volcano Hidden Treasure Corridor |
| Miglance Labyrinth | Miglance Labyrinth Tunnel | Miglance Labyrinth Forbidden Path |
| Man-eating Marsh | Man-eating Marsh Champion's Path | Man-eating Marsh Glory Ground |
| Saki's Dream World | Saki's Dream World - Affluent Sector | Saki's Dream World - Dark Space |
| Tower of Time | Tower of Time Midday Room | Tower of Time Eternity Room |
| Miglance Castle | Miglance Castle Gate Tower | Miglance Castle Gatehouse |
| Dragon Palace | Dragon Palace Whirlpool Corridor | Dragon Palace Bubble Corridor |
| Xeno-Domain | Xeno-Domain Manufacturing Sector | Xeno-Domain Secret Research District |
| Mementos | Road to Deep Solitude | |
| Corridor of Time Layers | Corridor of Time Layers Middle Space | Corridor of Time Layers Near Past Space |
| Darkrealm - Wyrmking's Domain | Raid Area | Road of Conquest |
| Wyrmrest Isle - Quadra Wastes | Drowned Wilds | Scoured Plains |
| Wyrmrest Isle - Dragon's Depths | Dragon's Depths Cleardrake | Dragon's Depths Domain |
| Path of Avarice | Tyrant's Path | |
| Mysterious Vortex - Tower of Selection | Tower of Selection - Bright | Tower of Selection - Blinding |
| Mysterious Vortex - Thundering Fortress | Thundering Fortress - Front Base | Thundering Fortress - Citadel |
| Mysterious Vortex - Land of Ro | Mercy Keep - Tiger Room | Mercy Keep - Moonless Room |
| Forgotten Tale: Unborn Visions | Anecdotes Under the Sea | Anecdotes of Decisions |
| Dreamslip Tower of Time | Forgotten Dream: Fate's Slumber | |
| Dream Flower | Overgrown Lab | Daybreak Tree |
| Mysterious Vortex - Dust City | Dust City - S.Commerce | Dust City - Condemned |
| Mysterious Vortex - Isle of Gospel | Treerest | Deep Glade |
| Mysterious Vortex - The Tower Argentauri | Tower Argentauri - Jade | Tower Argentauri - Bloodstone |
| The Riftbreaker | The Riftbreaker Observation Floor | The Riftbreaker Storage |
| Mayu's Dream World | Mayu's Dream World - Hospital Front | Mayu's Dream World - Exam Ward |
| Tower of Stars | Tower of Stars Unknown Life Floor | Tower of Stars High Research Floor |
| Dogma Tower | Dogma Tower - Secluded Corridor | Dogma Tower - Remote Space |
| Beast King's Castle | Beast King's Castle - Watchtower Parapets | Beast King's Castle - King's Tower Storage |
| Burning Beast King's Castle | Beast King's Castle Watchtower Parapets | Beast King's Castle King's Tower Storage |
| Former KMS HQ | Former KMS HQ - Satellite Floor | Former KMS HQ - Concealed Floor |
| Snake Liver Damaku | Snake Liver Damaku Pylorus | Snake Liver Damaku Cardia |
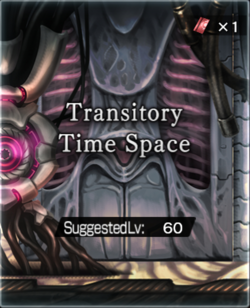
| Proto Eden | Proto Eden - Time Layer Division | Proto Eden - Comet Calculation |
| Toto Dreamland | Toto Dreamland - Wonder Area | Toto Dreamland - Paradise Theater |
Rare maps have higher Memoir item drop rates from the treasure chests, and some contain rare Horrors that drop unique materials.
The probabilities of a map turning into a rare area are as follows[1]:
| Probability | Description |
|---|---|
| 79% | Chance that both the 2nd Map and 3rd Map spawn as Normal maps |
| 10% | Probability of only the 2nd Map being Rare |
| 10% | Probability of only the 3rd Map being Rare |
| 1% | Probability of BOTH 2nd and 3rd Map being Rare |


