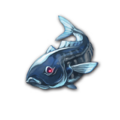
Fishing is a feature introduced in v1.3.1. By initiating The 1000 Year Ark of the Ocean Palace, you are first taken to Kira Beach and introduced to the minigame and the Kamasu Tackle Shop. Once this is enabled, fishing spots become available, even in places you've visited before.
To start fishing, select a fishing spot by looking for the fishing icon in the field. These locations also show up on the minimap for convenient navigation. Once there, select your bait and tap on the screen where you want to cast your line. Fish which are closer to where you cast your line are more likely to bite. If nothing seems to be biting, tap the screen again to pull your line back in and change your bait.
When a fish begins biting, you will notice its shadow briefly flash while it takes nibbles at your bait. Wait until it commits to taking the bait before you tap the screen to reel it in. The fish committing to the bait is indicated by the phone vibrating and the interface zooming in to your float. Tapping too soon or not tapping at all will result in the fish escaping with your bait.
Effort-saving tip for mobile devices: after you send out your bait but prior to a fish biting, press again and hold, waiting until a bite to release. This reduces strain on your fingers from trying to mash down quickly enough, and allows faster response time for hooking as well, lessening the dependency on the floater. Pro-Tip: if your vibration is turned on you don't even have to look at the screen to know that you've got an interested fish.
Fishing System[edit]
Area Level[edit]
The minimum level to use a fishing hole. If your rod level is not as high as the Area Level, no fish will bite, regardless of the bait you use.
 Rod Level[edit]
Your rod level increases as you catch more fish. Higher level rods allow you to catch bigger and more elusive fish. If your rod level is insufficient to catch a particular fish, the game will inform you that "the fish got away using its power". A great level discrepancy instead returns "the fish got away using its amazing power".
 Kamasu Points[edit]
Kamasu Points are awarded when you bring your fish to the Tackle Shop. These are primarily used to purchase upgrades and certain bait types. Bigger fish award more Kamasu Points, and higher-level cooler boxes give more bonus Kamasu points when turning your catches in.
 Fish Stone and
  Chronos rewards[edit]
Primarily received from Fishing Awards, though you can also receive 8 stones from progressing the Side Story
The 1000 Year Ark of the Ocean Palace. Fish Stones are used to purchase hook and cooler box upgrades. 1925 Fish Stones are required to purchase all available upgrades.
Current numbers of and in fishing
| Fish Rarity |
Chronos |
Fish Stones
|
| 1 - 3 |
3350 | 3094 |
| 4 - 5 |
275 | 182 |
| Fish pond awards |
420 | - |
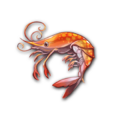
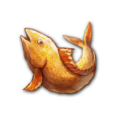
Fish Shadow[edit]
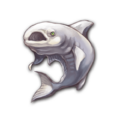
Each fishing area has up to 10 fish shadows, representing fish you can catch. As you reel in the fish (or fail to do so), more fish shadows can spawn. A maximum total of 20 fish shadows will spawn per area, after which it will replenish once the 30-minute reset timer lapses.
Shadows come in many sizes; usually the larger shadows indicate higher-level and bigger fish. Larger fish yield more fishing experience and Kamasu Points but require better rods or bait to reel in - M size fish require rods 1 level above their minimum; L size 2 levels; XL size 4 levels.
Double/Triple Catch[edit]
With a sufficiently-upgraded hook, you may get a double or triple catch, yielding more than one fish from a single shadow. Certain species of fish can only be acquired from multi-catches. A multi-catch can allow you to temporarily exceed your cooler box's capacity.
A shadow that's a multi-catch will also require a higher rod level to reel in, as the requirements will also count the highest level among all catches on top of stacking size modifiers. If a particular shadow refuses to bite, it's likely that it's a multi-catch hiding high-level fish.
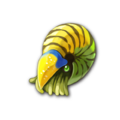
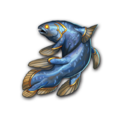
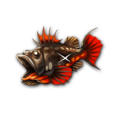
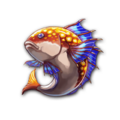
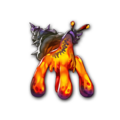
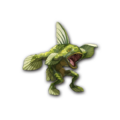
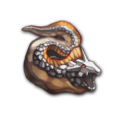
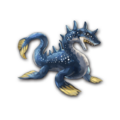
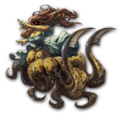
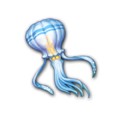
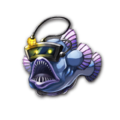
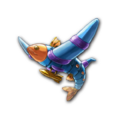
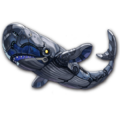
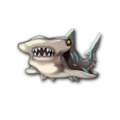
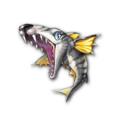
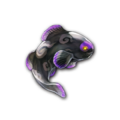
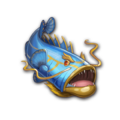
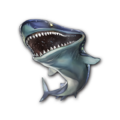
Fishing Enemies[edit]
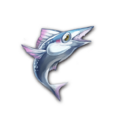
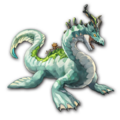
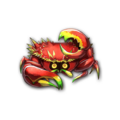
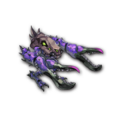
Some fish, once reeled in, will immediately commence an inescapable combat. They yield drops necessary for powerful weaponry, but will not contribute towards your Rod level. Certain enemies, which usually can only be caught with high-level bait and equipment, are extremely powerful Horrors and should only be challenged by a high-level party. Selling their drops to the shop allows the Rill weapons to be displayed. Most fishing enemies will struggle for a longer time before they get reeled in - if a fish is putting up a fight with the line, prepare for combat.
Failing to defeat the fish in combat will cause the fish shadow to disappear as if you had failed to reel it in. Forcibly exiting and restarting the app in the middle of fishing combat will revert the game state to just before you reeled that enemy in.
Fishing Enemies[edit]
Fishing Horrors[edit]
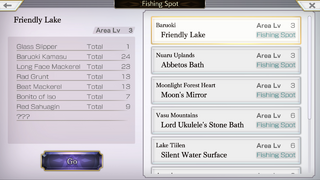
 Fishing Spots[edit]
When the player accesses a Fishing Spot, their Hook upgrade levels determine which shadows will be multi-catches. Also, a 30-minute reset timer will begin, after which the Fishing Spot's shadows will be fully regenerated.
| Era
|
Location
|
Name
|
Area Level
|
| Antiquity |
Kira Beach | Kira Beach | 1 |
| Antiquity |
Dragon Palace Outer / Inner | Dragon Palace Lake | 1 |
| Antiquity |
Acteul | Spirit's Shower | 3 |
| Antiquity |
Lake Tiilen | Silent Water Surface | 6 |
| Antiquity |
Vasu Mountain | Lord Ukulele's Stone Bath | 6 |
| Antiquity |
Zol Plains | Footprint of Daybreak | 7 |
| Antiquity |
Man-eating Marsh | Man-eating Marsh | 12 |
| Antiquity |
Charol Plains | Charol Well | 12 |
| Present |
Nuaru Uplands | Abbetos Bath | 3 |
| Present |
Baruoki | Friendly Lake | 3 |
| Present |
Moonlight Forest | Moon's Mirror | 3 |
| Present |
Karek Swampland | Half Fishman Garden | 6 |
| Present |
Rinde | Port Bridge | 6 |
| Present |
Serena Coast | Merchant's Sprinkler | 9 |
| Present |
Rucyana Sands | Desert Pot | 9 |
| Present |
Snake Neck Igoma | Beast's Respite | 10 |
| Present |
Ancient Battlefield | Long Forgotten Pond | 15 |
| Future |
Elzion Airport | Vaper Trail | 1 |
| Future |
Nilva | Peaceful Line | 13 |
| Future |
Last Island | Last Ocean | 16 |
| ??? |
Spacetime Rift | Dimension Bank | 15 |
Fishing Spot Guide[edit]

The button used to access the fishing spot guide
To access the Fishing Spot guide, you must complete Chapter 2 of the Side Story
The 1000 Year Ark of the Ocean Palace. After this, it will appear as a small button in the upper-right corner of the fishing spot menu.
In addition to helping track your catches at each spot, the guide also allows you to quick travel to any fishing spot you have discovered previously.
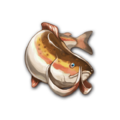
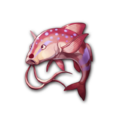
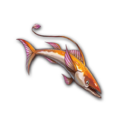
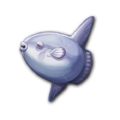
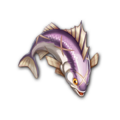
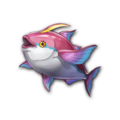
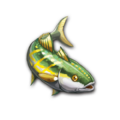
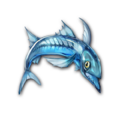
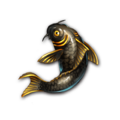
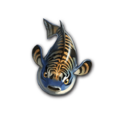
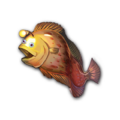
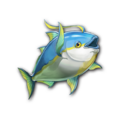
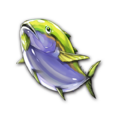
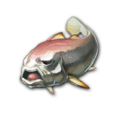
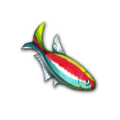
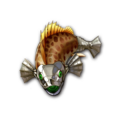
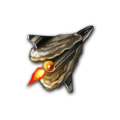
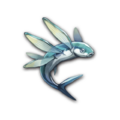
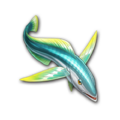
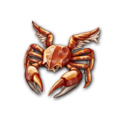
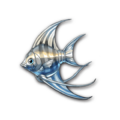
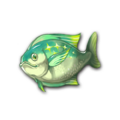
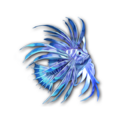
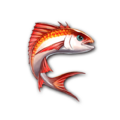
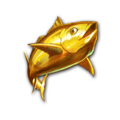
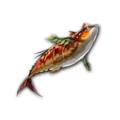
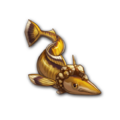
Fish Catalog[edit]
The data in the following catalog indicates the minimum requirements to catch the small size variation of each fish. If you meet the requirement but the fish escapes, it's likely you're trying to reel in something medium-size or larger. To improve your chances, try using rare bait of the matching tier, or upgrade your reel one to two steps past the minimum.
It is entirely possible for a shadow to be impossible to reel in because of a combination of size modifiers. A triple catch shadow involving a level 25 fish, all of which are XL-sized, will require a total level of 37 to reel in, while your rod level maxes at 30 and at best reaches 34 with use of rare bait.
Filterable and sortable Table of all Fish
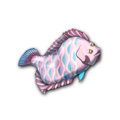
Kira Beach (Kira Beach)[edit]
Rarity: 1
Tier 1
Requirements:
Level: 0
Beginner Reel

-
24cm0.8
S - 12cm
0.4
Rarity: 1
Tier 1
Requirements:
Level: 1
Beginner Reel
-
24cm0.8
S - 12cm
0.4
Rarity: 1
Tier 1
Requirements:
Level: 1
Beginner Reel
-
32cm1.06
S - 16cm
0.53
Rarity: 1
Tier 1
Requirements:
Level: 3
Beginner Reel
-
48cm1.6
S - 24cm
0.8
Rarity: 1
Tier 1
Requirements:
Level: 4
Beginner Reel
-
43.2cm1.44
S - 21.6cm
0.72
Dragon Palace (Dragon Palace Lake)[edit]
Rarity: 1
Tier 1
Requirements:
Level: 0
Beginner Reel
-
24cm0.8
S - 12cm
0.4
Rarity: 1
Tier 1
Requirements:
Level: 1
Beginner Reel
-
8cm0.26
S - 4cm
0.13
Rarity: 1
Tier 1
Requirements:
Level: 1
Beginner Reel
-
24cm0.8
S - 12cm
0.4
Rarity: 1
Tier 1
(2)Can eat Rare T2 bait
Requirements:
Level: 3
Beginner Reel
-
51.2cm1.7
S - 25.6cm
0.85
Rarity: 1
Tier 2
Requirements:
Level: 5
Beginner Reel
-
80cm2.66
S - 40cm
1.33
Rarity: 1
Tier 2
Requirements:
Level: 7
Beginner Reel
-
96cm3.2
S - 48cm
1.6
Rarity: 1
Tier 2
Requirements:
Level: 7
Beginner Reel
-
128cm4.26
S - 64cm
2.13
Rarity: 1
Tier 3
Requirements:
Level: 9
Beginner reel III
-
160cm5.34
S - 80cm
2.67
Rarity: 2
Tier 3
Requirements:
Level: 11
Woody reel II
-
288cm9.6
S - 144cm
4.8
Rarity: 1
Tier 3
Requirements:
Level: 3
Beginner
-
80cm2.66
S - 40cm
1.33
Rarity: 1
Tier 3
Requirements:
Level: 3
Beginner
-
96cm3.2
S - 48cm
1.6
Rarity: 1
Tier 3
Requirements:
Level: 3
Beginner
-
160cm5.34
S - 80cm
2.67
Rarity: 1
Tier 4
Requirements:
Level: 3
Beginner
-
144cm4.8
S - 72cm
2.4
Rarity: 1
Tier 4
Requirements:
Level: 3
Beginner
-
192cm6.4
S - 96cm
3.2
Rarity: 1
Tier 4
(5)Can eat Rare T5 bait
Requirements:
Level: 15
Woody reel III
-
128cm4.26
S - 64cm
2.13
Vasu Mountains (Lord Ukulele's Stone Bath)[edit]
Rarity: 1
Tier 1
Requirements:
Level: 0
Beginner Reel
-
24cm0.8
S - 12cm
0.4
Rarity: 1
Tier 2
Requirements:
Level: 7
Beginner Reel
-
96cm3.2
S - 48cm
1.6
Rarity: 1
Tier 2
Requirements:
Level: 7
Beginner Reel
-
112cm3.74
S - 56cm
1.87
Rarity: 1
Tier 3
Requirements:
Level: 1
Woody reel II
-
192cm6.4
S - 96cm
3.2
Rarity: 1
Tier 3
Requirements:
Level: 9
Beginner reel IV
-
80cm2.66
S - 40cm
1.33
Rarity: 1
Tier 4
Requirements:
Level: 13
Woody reel II
-
128cm4.26
S - 64cm
2.13
Rarity: 3
Tier 5
Requirements:
Level: 15
Basic reel I
-
480cm16
S - 240cm
8
Lake Tiilen (Silent Water Surface)[edit]
Rarity: 1
Tier 1
Requirements:
Level: 0
Beginner Reel
-
24cm0.8
S - 12cm
0.4
Rarity: 1
Tier 1
Requirements:
Level: 3
Beginner Reel
-
48cm1.6
S - 24cm
0.8
Rarity: 1
Tier 1
Requirements:
Level: 4
Beginner Reel
-
43.2cm1.44
S - 21.6cm
0.72
Rarity: 1
Tier 2
Requirements:
Level: 1
Beginner Reel
-
208cm6.94
S - 104cm
3.47
Rarity: 1
Tier 2
Requirements:
Level: 7
Beginner reel III
-
128cm4.26
S - 64cm
2.13
Rarity: 1
Tier 3
Requirements:
Level: 11
Woody reel I
-
96cm3.2
S - 48cm
1.6
Rarity: 1
Tier 4
Requirements:
Level: 13
Woody reel III
-
238.4cm7.94
S - 119.2cm
3.97
Rarity: 1
Tier 4
(5)Can eat Rare T5 bait
Requirements:
Level: 15
Woody reel III
-
128cm4.26
S - 64cm
2.13
Rarity: 1
Tier 5
Requirements:
Level: 17
Basic reel II
-
336cm11.2
S - 168cm
5.6
Acteul (Spirit's Shower)[edit]
Rarity: 1
Tier 1
Requirements:
Level: 0
Beginner Reel
-
24cm0.8
S - 12cm
0.4
Rarity: 2
Tier 1
Requirements:
Level: 0
Beginner Reel
-
40cm1.34
S - 20cm
0.67
Rarity: 1
Tier 1
Requirements:
Level: 1
Beginner Reel
-
32cm1.06
S - 16cm
0.53
Rarity: 1
Tier 1
Requirements:
Level: 3
Beginner Reel
-
48cm1.6
S - 24cm
0.8
Rarity: 1
Tier 1
Requirements:
Level: 3
Beginner Reel
-
49.6cm1.66
S - 24.8cm
0.83
Rarity: 1
Tier 2
Requirements:
Level: 1
Beginner Reel
-
208cm6.94
S - 104cm
3.47
Rarity: 1
Tier 3
Requirements:
Level: 9
Woody reel I
-
128cm4.26
S - 64cm
2.13
Rarity: 1
Tier 5
(6)Can eat Rare T6 bait
Requirements:
Level: 17
Basic reel II
-
320cm10.66
S - 160cm
5.33
Rarity: 1
Tier 6
Requirements:
Level: 19
Basic reel IV
-
400cm13.34
S - 200cm
6.67
Rarity: 4
Tier 6
Requirements:
Level: 30
Smooth reel IV
-
3200cm106.66
S - 1600cm
53.33
Man-eating Marsh (Man-eating Marsh)[edit]
Rarity: 1
Tier 1
Requirements:
Level: 0
Beginner Reel
-
24cm0.8
S - 12cm
0.4
Rarity: 1
Tier 3
Requirements:
Level: 9
Beginner reel IV
-
144cm4.8
S - 72cm
2.4
Rarity: 1
Tier 4
Requirements:
Level: 13
Woody reel I
-
144cm4.8
S - 72cm
2.4
Rarity: 1
Tier 4
Requirements:
Level: 15
Woody reel I
-
128cm4.26
S - 64cm
2.13
Rarity: 3
Tier 4
Requirements:
Level: 17
Woody reel II
-
480cm16
S - 240cm
8
Rarity: 1
Tier 6
Requirements:
Level: 19
Basic reel IV
-
24cm0.8
S - 12cm
0.4
Charol Plains (Charol Well)[edit]
Rarity: 1
Tier 1
Requirements:
Level: 0
Beginner Reel
-
24cm0.8
S - 12cm
0.4
Rarity: 1
Tier 1
Requirements:
Level: 1
Beginner Reel
-
24cm0.8
S - 12cm
0.4
Rarity: 1
Tier 2
Requirements:
Level: 1
Beginner Reel
-
208cm6.94
S - 104cm
3.47
Rarity: 1
Tier 4
Requirements:
Level: 13
Woody reel I
-
144cm4.8
S - 72cm
2.4
Rarity: 1
Tier 5
(6)Can eat Rare T6 bait
Requirements:
Level: 17
Basic reel II
-
272cm9.06
S - 136cm
4.53
Rarity: 1
Tier 5
(6)Can eat Rare T6 bait
Requirements:
Level: 17
Basic reel I
-
296cm9.86
S - 148cm
4.93
Rarity: 1
Tier 6
Requirements:
Level: 19
Basic reel IV
-
160cm5.34
S - 80cm
2.67
Rarity: 1
Tier 6
Requirements:
Level: 21
Basic reel V
-
16cm0.54
S - 8cm
0.27
Baruoki (Friendly Lake)[edit]
Rarity: 2
Tier 1
Requirements:
Level: 0
Beginner Reel
-
35.2cm1.18
S - 17.6cm
0.59
Rarity: 1
Tier 1
(2)Can eat Rare T2 bait
Requirements:
Level: 3
Beginner Reel
-
48cm1.6
S - 24cm
0.8
Rarity: 1
Tier 1
(2)Can eat Rare T2 bait
Requirements:
Level: 3
Beginner Reel
-
64cm2.14
S - 32cm
1.07
Rarity: 1
Tier 2
Requirements:
Level: 1
Beginner reel III
-
240cm8
S - 120cm
4
Rarity: 1
Tier 2
Requirements:
Level: 5
Beginner Reel
-
64cm2.14
S - 32cm
1.07
Rarity: 1
Tier 2
Requirements:
Level: 5
Beginner Reel
-
96cm3.2
S - 48cm
1.6
Rarity: 1
Tier 3
Requirements:
Level: 9
Beginner reel III
-
80cm2.66
S - 40cm
1.33
Rarity: 3
Tier 6
Requirements:
Level: 18
Basic reel IV
-
2080cm69.34
S - 1040cm
34.67
Rinde (Port Bridge)[edit]
Rarity: 1
Tier 1
Requirements:
Level: 0
Beginner Reel
-
35.2cm1.18
S - 17.6cm
0.59
Rarity: 1
Tier 2
Requirements:
Level: 5
Beginner reel III
-
48cm1.6
S - 24cm
0.8
Rarity: 1
Tier 2
Requirements:
Level: 5
Beginner reel III
-
56cm1.86
S - 28cm
0.93
Rarity: 1
Tier 2
Requirements:
Level: 7
Beginner Reel
-
48cm1.6
S - 24cm
0.8
Rarity: 1
Tier 3
Requirements:
Level: 1
Beginner reel IV
-
160cm5.34
S - 80cm
2.67
Rarity: 5
Tier 3
Requirements:
Level: 9
Woody reel II
-
532.8cm17.76
S - 266.4cm
8.88
Rarity: 1
Tier 4
Requirements:
Level: 13
Woody reel II
-
208cm6.94
S - 104cm
3.47
Rarity: 1
Tier 5
(6)Can eat Rare T6 bait
Requirements:
Level: 17
Basic reel III
-
256cm8.54
S - 128cm
4.27
Rarity: 1
Tier 5
(6)Can eat Rare T6 bait
Requirements:
Level: 17
Basic reel III
-
336cm11.2
S - 168cm
5.6
Nuaru Uplands (Abbetos Bath)[edit]
Rarity: 1
Tier 1
Requirements:
Level: 0
Beginner Reel
-
35.2cm1.18
S - 17.6cm
0.59
Rarity: 1
Tier 1
(2)Can eat Rare T2 bait
Requirements:
Level: 3
Beginner Reel
-
48cm1.6
S - 24cm
0.8
Rarity: 1
Tier 1
(2)Can eat Rare T2 bait
Requirements:
Level: 3
Beginner Reel
-
64cm2.14
S - 32cm
1.07
Rarity: 1
Tier 2
Requirements:
Level: 1
Beginner reel III
-
240cm8
S - 120cm
4
Rarity: 1
Tier 2
Requirements:
Level: 5
Beginner Reel
-
64cm2.14
S - 32cm
1.07
Rarity: 1
Tier 2
Requirements:
Level: 5
Beginner Reel
-
96cm3.2
S - 48cm
1.6
Rarity: 1
Tier 3
Requirements:
Level: 9
Beginner reel III
-
80cm2.66
S - 40cm
1.33
Moonlight Forest (Moon's Mirror)[edit]
Rarity: 2
Tier 1
Requirements:
Level: 1
Beginner Reel
-
96cm3.2
S - 48cm
1.6
Rarity: 1
Tier 1
Requirements:
Level: 3
Beginner
-
80cm2.66
S - 40cm
1.33
Rarity: 1
Tier 2
Requirements:
Level: 3
Beginner
-
64cm2.14
S - 32cm
1.07
Rarity: 1
Tier 3
Requirements:
Level: 9
Beginner reel III
-
80cm2.66
S - 40cm
1.33
Rarity: 1
Tier 3
Requirements:
Level: 9
Beginner reel IV
-
112cm3.74
S - 56cm
1.87
Rarity: 1
Tier 3
Requirements:
Level: 9
Beginner reel IV
-
176cm5.86
S - 88cm
2.93
Karek Swampland (Half Fishman Garden)[edit]
Rarity: 1
Tier 1
Requirements:
Level: 0
Beginner Reel
-
35.2cm1.18
S - 17.6cm
0.59
Rarity: 1
Tier 2
Requirements:
Level: 1
Beginner reel III
-
240cm8
S - 120cm
4
Rarity: 1
Tier 2
Requirements:
Level: 7
Beginner Reel
-
48cm1.6
S - 24cm
0.8
Rarity: 1
Tier 2
Requirements:
Level: 7
Beginner Reel
-
64cm2.14
S - 32cm
1.07
Rarity: 1
Tier 2
Requirements:
Level: 7
Beginner Reel
-
96cm3.2
S - 48cm
1.6
Rarity: 1
Tier 3
Requirements:
Level: 9
Beginner reel IV
-
112cm3.74
S - 56cm
1.87
Rarity: 1
Tier 3
Requirements:
Level: 11
Beginner reel IV
-
208cm6.94
S - 104cm
3.47
Rarity: 1
Tier 4
Requirements:
Level: 13
Beginner reel IV
-
88cm2.94
S - 44cm
1.47
Serena Coast (Merchant's Sprinkler)[edit]
Rarity: 1
Tier 1
Requirements:
Level: 0
Beginner Reel
-
35.2cm1.18
S - 17.6cm
0.59
Rarity: 2
Tier 1
Requirements:
Level: 0
Beginner Reel
-
35.2cm1.18
S - 17.6cm
0.59
Rarity: 1
Tier 3
Requirements:
Level: 1
Beginner reel IV
-
160cm5.34
S - 80cm
2.67
Rarity: 1
Tier 3
Requirements:
Level: 9
Beginner reel IV
-
112cm3.74
S - 56cm
1.87
Rarity: 1
Tier 3
Requirements:
Level: 9
Beginner reel IV
-
176cm5.86
S - 88cm
2.93
Rarity: 1
Tier 4
Requirements:
Level: 13
Woody reel II
-
144cm4.8
S - 72cm
2.4
Rarity: 1
Tier 4
Requirements:
Level: 15
Woody reel II
-
240cm8
S - 120cm
4
Rarity: 1
Tier 6
Requirements:
Level: 19
Basic reel V
-
336cm11.2
S - 168cm
5.6
Rarity: 4
Tier 6
Requirements:
Level: 30
Smooth reel IV
-
1600cm53.34
S - 800cm
26.67
Ancient Battlefield (Long Forgotten Pond)[edit]
Rarity: 1
Tier 4
Requirements:
Level: 3
Beginner
-
160cm5.34
S - 80cm
2.67
Rarity: 1
Tier 5
(6)Can eat Rare T6 bait
Requirements:
Level: 3
Beginner
-
192cm6.4
S - 96cm
3.2
Rarity: 1
Tier 5
Requirements:
Level: 3
Beginner
-
256cm8.54
S - 128cm
4.27
Rarity: 1
Tier 5
(6)Can eat Rare T6 bait
Requirements:
Level: 17
Basic reel III
-
256cm8.54
S - 128cm
4.27
Rarity: 1
Tier 6
Requirements:
Level: 18
Beginner
-
288cm9.6
S - 144cm
4.8
Rarity: 1
Tier 6
Requirements:
Level: 20
Beginner
-
96cm3.2
S - 48cm
1.6
Snake Neck Igoma (Beast's Respite)[edit]
Rarity: 1
Tier 4
Requirements:
Level: 13
Beginner reel IV
-
88cm2.94
S - 44cm
1.47
Rarity: 1
Tier 4
Requirements:
Level: 13
Woody reel II
-
208cm6.94
S - 104cm
3.47
Rarity: 1
Tier 4
Requirements:
Level: 15
Woody reel II
-
240cm8
S - 120cm
4
Rarity: 1
Tier 4
(5)Can eat Rare T5 bait
Requirements:
Level: 15
?
-
240cm8
S - 120cm
4
Rarity: 2
Tier 4
(5)Can eat Rare T5 bait
Requirements:
Level: 15
?
-
160cm5.34
S - 80cm
2.67
Rarity: 1
Tier 4
(5)Can eat Rare T5 bait
Requirements:
Level: 17
Beginner
-
192cm6.4
S - 96cm
3.2
Rucyana Sands (Desert Pot)[edit]
Rarity: 1
Tier 1
Requirements:
Level: 0
Beginner Reel
-
35.2cm1.18
S - 17.6cm
0.59
Rarity: 2
Tier 1
Requirements:
Level: 0
Beginner Reel
-
35.2cm1.18
S - 17.6cm
0.59
Rarity: 2
Tier 2
Requirements:
Level: 5
Beginner reel IV
-
56cm1.86
S - 28cm
0.93
Rarity: 1
Tier 3
Requirements:
Level: 9
Woody reel I
-
160cm5.34
S - 80cm
2.67
Rarity: 1
Tier 3
Requirements:
Level: 11
Woody reel I
-
48cm1.6
S - 24cm
0.8
Rarity: 1
Tier 4
Requirements:
Level: 1
Woody reel II
-
320cm10.66
S - 160cm
5.33
Rarity: 1
Tier 4
Requirements:
Level: 13
Woody reel II
-
96cm3.2
S - 48cm
1.6
Rarity: 1
Tier 4
Requirements:
Level: 15
Woody reel II
-
192cm6.4
S - 96cm
3.2
Rarity: 1
Tier 6
Requirements:
Level: 19
Basic reel V
-
400cm13.34
S - 200cm
6.67
Rarity: 4
Tier 6
Requirements:
Level: 30
Smooth reel III
-
1296cm43.2
S - 648cm
21.6
Last Island (Last Ocean)[edit]
Rarity: 2
Tier 1
Requirements:
Level: 0
Beginner Reel
-
41.6cm1.38
S - 20.8cm
0.69
Rarity: 1
Tier 1
Requirements:
Level: 13
Basic reel I
-
160cm5.34
S - 80cm
2.67
Rarity: 1
Tier 1
Requirements:
Level: 13
Basic reel I
-
368cm12.26
S - 184cm
6.13
Rarity: 1
Tier 1
Requirements:
Level: 13
Basic reel I
-
496cm16.54
S - 248cm
8.27
Rarity: 1
Tier 2
Requirements:
Level: 17
Basic reel I
-
312cm10.4
S - 156cm
5.2
Rarity: 1
Tier 2
Requirements:
Level: 19
Basic reel I
-
768cm25.6
S - 384cm
12.8
Rarity: 3
Tier 2
Requirements:
Level: 19
Basic reel V
-
800cm26.66
S - 400cm
13.33
Rarity: 1
Tier 2
Requirements:
Level: 20
Basic reel V
-
640cm21.34
S - 320cm
10.67
Nilva (Peaceful Line)[edit]
Rarity: 1
Tier 1
Requirements:
Level: 0
Beginner Reel
-
16cm0.54
S - 8cm
0.27
Rarity: 1
Tier 1
Requirements:
Level: 1
Beginner Reel
-
56cm1.86
S - 28cm
0.93
Rarity: 1
Tier 2
Requirements:
Level: 5
Beginner Reel
-
80cm2.66
S - 40cm
1.33
Rarity: 2
Tier 3
Requirements:
Level: 1
Woody reel I
-
240cm8
S - 120cm
4
Rarity: 1
Tier 4
Requirements:
Level: 13
Woody reel III
-
160cm5.34
S - 80cm
2.67
Rarity: 1
Tier 4
(5)Can eat Rare T5 bait
Requirements:
Level: 15
Basic reel I
-
128cm4.26
S - 64cm
2.13
Rarity: 1
Tier 5
(6)Can eat Rare T6 bait
Requirements:
Level: 17
Basic reel I
-
224cm7.46
S - 112cm
3.73
Rarity: 1
Tier 5
(6)Can eat Rare T6 bait
Requirements:
Level: 17
Basic reel I
-
288cm9.6
S - 144cm
4.8
Rarity: 5
Tier 6
Requirements:
Level: 26
Smooth reel II
-
320cm10.66
S - 160cm
5.33
Elzion Airport (Vaper Trail)[edit]
Rarity: 1
Tier 1
Requirements:
Level: 0
Beginner Reel
-
16cm0.54
S - 8cm
0.27
Rarity: 2
Tier 1
Requirements:
Level: 0
Beginner Reel
-
41.6cm1.38
S - 20.8cm
0.69
Rarity: 1
Tier 1
Requirements:
Level: 1
Beginner Reel
-
16cm0.54
S - 8cm
0.27
Rarity: 1
Tier 1
Requirements:
Level: 1
Beginner Reel
-
56cm1.86
S - 28cm
0.93
Rarity: 1
Tier 2
Requirements:
Level: 5
Beginner Reel
-
64cm2.14
S - 32cm
1.07
Rarity: 1
Tier 2
Requirements:
Level: 5
Beginner Reel
-
80cm2.66
S - 40cm
1.33
Rarity: 1
Tier 3
Requirements:
Level: 1
Woody reel I
-
144cm4.8
S - 72cm
2.4
Rarity: 1
Tier 3
Requirements:
Level: 9
Woody reel I
-
144cm4.8
S - 72cm
2.4
Rarity: 1
Tier 4
Requirements:
Level: 13
Woody reel II
-
240cm8
S - 120cm
4
Rarity: 1
Tier 4
(5)Can eat Rare T5 bait
Requirements:
Level: 15
Woody reel I
-
144cm4.8
S - 72cm
2.4
Rarity: 2
Tier 5
(6)Can eat Rare T6 bait
Requirements:
Level: 17
Basic reel I
-
296cm9.86
S - 148cm
4.93
Rarity: 1
Tier 6
Requirements:
Level: 19
Basic reel I
-
352cm11.74
S - 176cm
5.87
Rarity: 5
Tier 6
Requirements:
Level: 26
Smooth reel II
-
984cm32.8
S - 492cm
16.4
Rarity: 4
Tier 6
Requirements:
Level: 30
Smooth reel III
-
1600cm53.34
S - 800cm
26.67
Spacetime Rift (Dimension Bank)[edit]
Rarity: 2
Tier 1
Requirements:
Level: 0
Beginner Reel
-
40cm1.34
S - 20cm
0.67
Rarity: 2
Tier 4
(5)Can eat Rare T5 bait
Requirements:
Level: 1
Woody reel II
-
352cm11.74
S - 176cm
5.87
Rarity: 3
Tier 4
(5)Can eat Rare T5 bait
Requirements:
Level: 1
Basic reel I
-
960cm32
S - 480cm
16
Rarity: 1
Tier 4
(5)Can eat Rare T5 bait
Requirements:
Level: 15
Woody reel II
-
16cm0.54
S - 8cm
0.27
Rarity: 1
Tier 4
(5)Can eat Rare T5 bait
Requirements:
Level: 15
Woody reel I
-
112cm3.74
S - 56cm
1.87
Rarity: 1
Tier 4
(5)Can eat Rare T5 bait
Requirements:
Level: 15
Basic reel I
-
240cm8
S - 120cm
4
Rarity: 1
Tier 5
(6)Can eat Rare T6 bait
Requirements:
Level: 17
Basic reel I
-
312cm10.4
S - 156cm
5.2
Rarity: 3
Tier 6
Requirements:
Level: 1
Smooth reel III
-
6318cm210.6
S - 3159cm
105.3
Rarity: 1
Tier 6
Requirements:
Level: 19
Basic reel IV
-
352cm11.74
S - 176cm
5.87
Rarity: 3
Tier 6
Requirements:
Level: 23
Basic reel V
-
288cm9.6
S - 144cm
4.8
 Kamasu Tackle Shop[edit]
At the fishing store, you can upgrade your rod and buy bait.
Talk to the Storekeeper to trade your fish for "Kamasu Points." The selection of products the shop offers will expand as the level of your fishing rod increases.
 Bait
Bait
Bait and fish are divided by 6 tiers. Tier 1 baits are readily available from the start but usually restrict you to low-rank fish, including random trash like footwear and bottles. Tier 6 bait lets you reel in fish that yield the most Kamasu points and fishing experience, and may even reel in Fishing Horrors.
Each tier of bait has 2 types of bait:
- Normal bait - Cheaper generic bait. All fish from first tier and up to tier of bait will be able to eat it and be caught on this bait.
- Rare bait - More expensive bait. It serves several purposes:
- It adds +4 levels to the current level of rod and makes possible to catch larger fish that can't be caught with usual bait due to low rod level. When fish "got away due to its power" or "got away", try rare bait.
- Only the same tier of fish will eat rare bait, with some exceptions. Bait can be used to save time by targeting a specific tier of fish when you don't need lower-tier fish already.
When fishing in the Last Island, bear in mind that the fish there will only bite on the Crab Cake and Premium Crab Cake. No other baits will work here, and the exclusive baits will not work in the other Fishing Spots.
| Name |
Min Rod Lv |
Rec Rod Lv |
Tier of Bait |
Cost
|
| Fishing Dango |
- |
2 |
T1 |
 x500 x500
|
| Worm |
- |
5 |
T2 |
x1,000
|
| Unexpected Worm |
- |
4 |
T2 Rare |
x3,000
|
| Shopaholic Clam |
7 |
8 |
T3 |
x1
|
| Spree Snail |
7 |
6 |
T3 Rare |
x2
|
| Dressed Crab |
7 |
14 |
T4 |
x3
|
| Tear Crab |
7 |
10 |
T4 Rare |
x4
|
| Foamy Worm |
15 |
14 |
T5 |
x6
|
| Bubbly Worm |
15 |
13 |
T5 Rare |
x8
|
| Snitch Sardine |
15 |
21 |
T6 |
x8
|
| Blabber Sardine |
22 |
22 |
T6 Rare |
x15
|
| Bait for Last Island
|
| Crab Cake |
15 |
15 |
LI T1 |
x4,000
|
| Premium Crab Cake |
15 |
21 |
LI T2 |
x6,000
|
 Cooler
Cooler upgrades determine how many fish you can hold at once, on top of providing more bonus Kamasu points when turning your catches in. It is commonly recommended to halt upgrades at Iron Cooling Box I or II, only putting any further investment to accommodate triple catches or to improve Kamasu point profits.
| Name |
Capacity |
Bonus |
Cost
|
| Wooden Cooling Box |
20 |
- |
Default
|
| Wooden Cooling Box II |
40 |
25% |
x5
|
| Wooden Cooling Box III |
60 |
50% |
x10
|
| Iron Cooling Box |
80 |
125% |
x15
|
| Iron Cooling Box II |
100 |
150% |
x20
|
| Iron Cooling Box III |
150 |
200% |
x30
|
| Refrigerator |
200 |
250% |
x40
|
| Refrigerator II |
300 |
300% |
x60
|
| Refrigerator III |
400 |
400% |
x80
|
| Refrigerator IV |
500 |
500% |
x100
|
 Hook
Hook
Having these Hook upgrades causes fishing spots to start spawning shadows that yield multi-catches once they are accessed.
The Fish Hook II enables double-catches, while the Dimensional Hook enables triple-catches. Upgrading your Hook above the threshold levels increases probability of double or triple fish shadows spawning. The Dimensional Hook is essential to being able to reel in the Lake Lords.
| Name |
Min Rod Lv |
Cost
|
| Fish Hook |
- |
Default
|
| Fish Hook II |
- |
x5
|
| Fish Hook III |
- |
x10
|
| Big Fish Hook |
7 |
x20
|
| Big Fish Hook II |
7 |
x40
|
| Big Fish Hook III |
7 |
x60
|
| Claw Hook |
15 |
x80
|
| Claw Hook II |
15 |
x100
|
| Claw Hook III |
15 |
x120
|
| Orochi Hook |
15 |
x150
|
| Orochi Hook II |
15 |
x180
|
| Orochi Hook III |
15 |
x200
|
| Dimensional Hook |
15 |
x200
|
| Dimensional Hook II |
15 |
x200
|
| Dimensional Hook III |
15 |
x200
|
 Reel
Reel
Better reels allow you to catch faster fish. Not having a sufficiently-upgraded reel causes a fish to escape and the game to mention "The fish got away using its speed".
It is recommended to upgrade to Master Reel in order to be able to consistently reel in the Lake Lords.
| Name |
Cost
|
| Beginner Reel |
Default
|
| Beginner Reel II |
x3
|
| Beginner Reel III |
x8
|
| Beginner Reel IV |
x15
|
| Beginner Reel V |
x30
|
| Woody Reel |
x60
|
| Woody Reel II |
x100
|
| Woody Reel III |
x120
|
| Woody Reel IV |
x160
|
| Woody Reel V |
x200
|
| Basic Reel |
x300
|
| Basic Reel II |
x400
|
| Basic Reel III |
x500
|
| Basic Reel IV |
x600
|
| Basic Reel V |
x1,000
|
| Custom Reel |
x1,300
|
| Custom Reel II |
x1,600
|
| Custom Reel III |
x2,100
|
| Custom Reel IV |
x2,500
|
| Custom Reel V |
x3,100
|
| Smooth Reel |
x4,100
|
| Smooth Reel II |
x5,200
|
| Smooth Reel III |
x6,300
|
| Smooth Reel IV |
x8,400
|
| Smooth Reel V |
x9,500
|
| Master Reel |
x10,600
|
| Master Reel II |
x11,700
|
| Master Reel III |
x12,800
|
| Master Reel IV |
x13,900
|
| Master Reel V |
x15,000
|
 Float
Float
The float increases reaction window between the moment when fish bites, and the moment when fish runs away with bait. If "the fish got away" almost instantly, it means you will need to upgrade your float.
The float is not as essential an upgrade as the rest of the fishing goods. The Rubber Float II should be sufficient to reel most of your catches in.
| Name |
Cost
|
| Clay Float |
Default
|
| Clay Float II |
x8
|
| Clay Float III |
x30
|
| Pumice Float |
x100
|
| Pumice Float II |
x160
|
| Pumice Float III |
x300
|
| Nut Float |
x500
|
| Nut Float II |
x1,000
|
| Nut Float III |
x1,600
|
| Rubber Float |
x2,500
|
| Rubber Float II |
x3,900
|
| Rubber Float III |
x6,100
|
| New Material Float |
x8,900
|
| New Material Float II |
x11,100
|
| New Material Float III |
x13,000
|
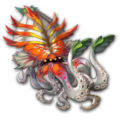
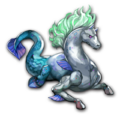
Acquiring Levia[edit]
Levia is a free character that can be acquired after doing high-level fishing.
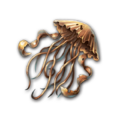
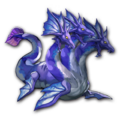
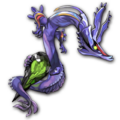
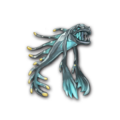
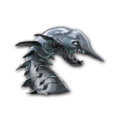
The strongest of the fishing Horrors, namely the Sky Serpent, Scylla, Hydra, and Kraken, are nicknamed "Lake Lords". They are only caught via triple-catches and need a highly-upgraded reel and float to catch. Defeating each of the Lake Lords for the first time gives you a Pieces of Red Coral, and by collecting all four, they form the Sea of Fire, which unlocks the fight with the Leviathan in the Dragon Palace Central Keep.
After defeating Leviathan, the sidequest Waves of Time: The Millennium Maiden's Pearl Tears unlocks. Clearing that sidequest adds Levia to your roster (you will need a Golden Tuna for this quest).
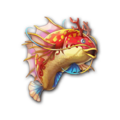
Rill Weapons[edit]
In addition to obtaining Levia, the fishing mini-game unlocked during The 1000 Year Ark of the Ocean Palace side-quest also yields monster drops that are used to synthesize Rill Weapons.
All the Rill Weapons will require 1 drop obtained from defeating a Fishing Horror before they are displayed in the blacksmith.
| Name |
Stats |
Obtain / Effects | Materials |
|---|
|
|
185 - MAt
22 - Atk
60 - LVL
|
Purchased from Blacksmith |
|
|
|
185 - Atk
22 - MAt
60 - LVL
|
Purchased from Blacksmith |
|
|
|
192 - Atk
32 - MAt
60 - LVL
|
Purchased from Blacksmith |
|
|
|
199 - Atk
8 - MAt
60 - LVL
|
Purchased from Blacksmith |
|
|
|
185 - Atk
22 - MAt
60 - LVL
|
Purchased from Blacksmith |
|
|
|
166 - Atk
47 - MAt
60 - LVL
|
Purchased from Blacksmith |
|
|
|
181 - Atk
30 - MAt
60 - LVL
|
Purchased from Blacksmith |
|
|
|
166 - Atk
121 - MAt
60 - LVL
|
Purchased from Blacksmith |
|
Older Fishing Guides[edit]